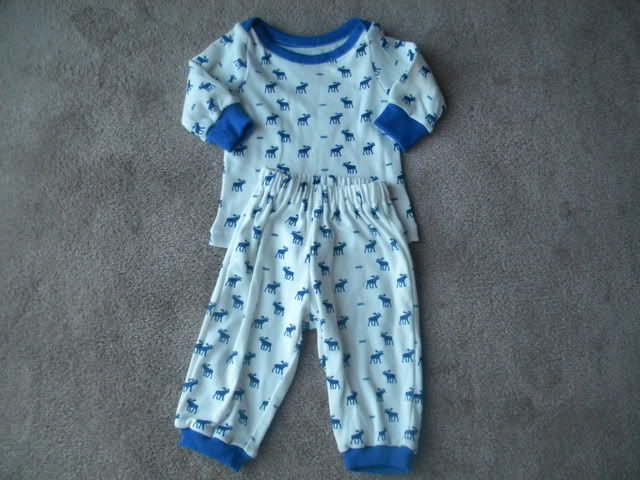
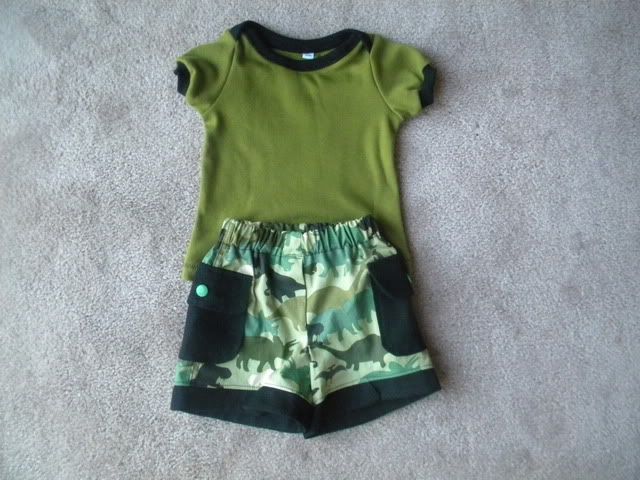
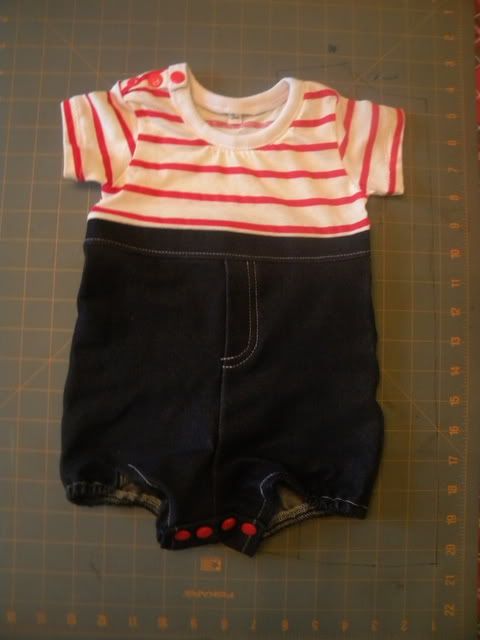
I recently made 2 baby outfits for a friend who was giving them as a gift! I am pretty sure I have never turned down the opportunity to make baby clothes!
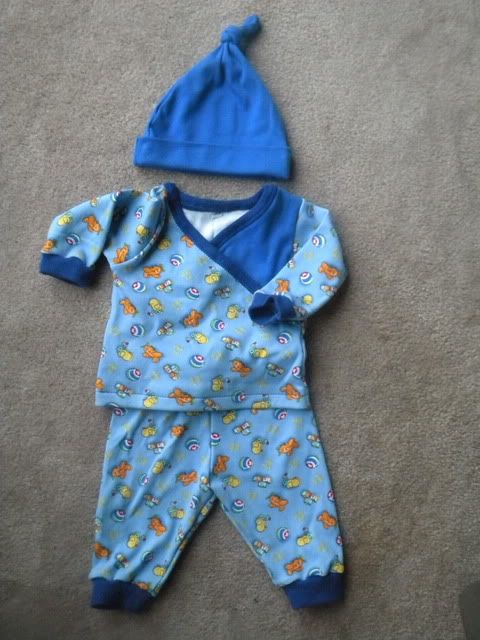
The first outfit is from one of my favorite pattterns ever! The New Conceptions Baby Essentials pattern! It has a button down shirt, a cross over shirt, pants and shorts! There is also a hat and bootie pattern which are very cute as well. I have never made the booties but have made the hat several times..
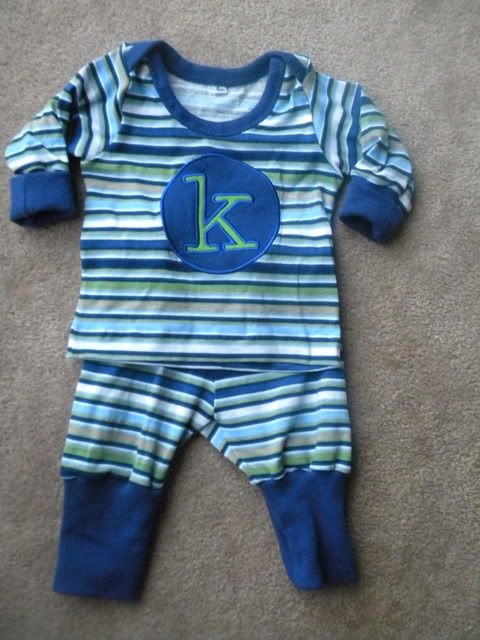
Then I used the shirt and pants pattern from my favorite Ottobre magazine, 1/2009! Really, I needed to get this outfit done and I already had it traced in the correct size. I finally used up most of the stripe facbric that I purchased from Girl Charlee last year. I bought 2 yards and when you make baby clothes it sure doesn't get used up very fast!!
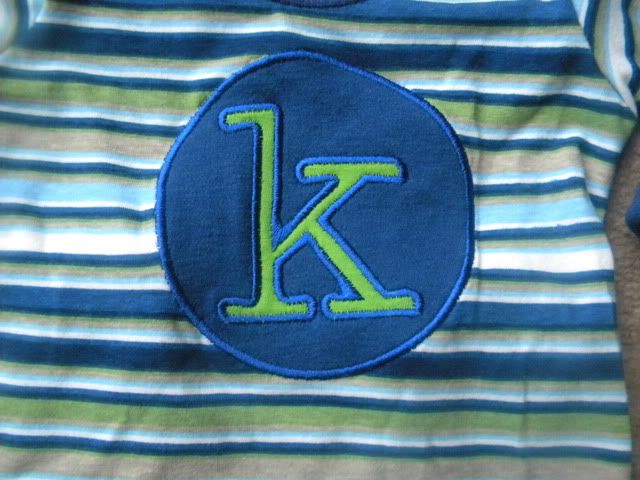
On this one I decided to put an applique in the center to jazz it up. It turned out really well! I just hope they stuck woth the name they had picked out ahead of time...
In this pic the pant cuffs are rolled all the way down. They are meant to be folded up in half like the sleeves!
Close up of the applique!
Thursday, May 31, 2012
Monday, May 14, 2012
Strawberry breakfast feliz
My mom works for a local university and every year the President and his wife hold a breakfast for all employees. It's called the Strawberry breakfast because it features a buffet of delicious strawberries and all the toppings you could imagine! Whipped cream, powdered sugar and chocolate to name a few. In addition, they have all the traditional breakfast foods.
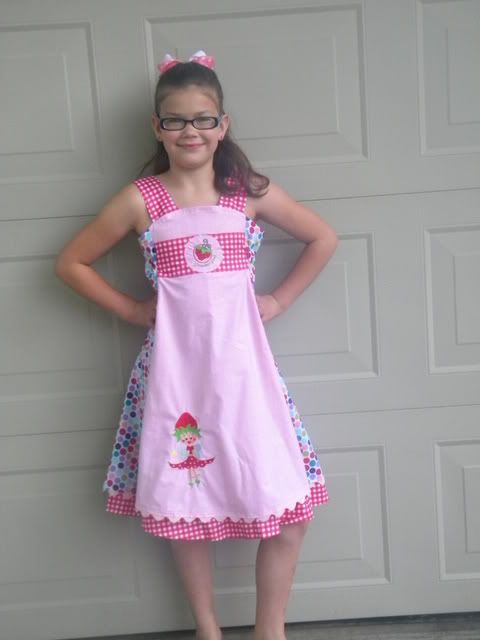
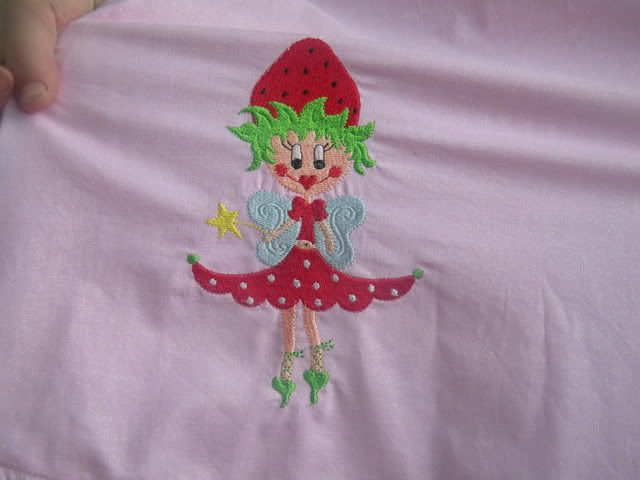
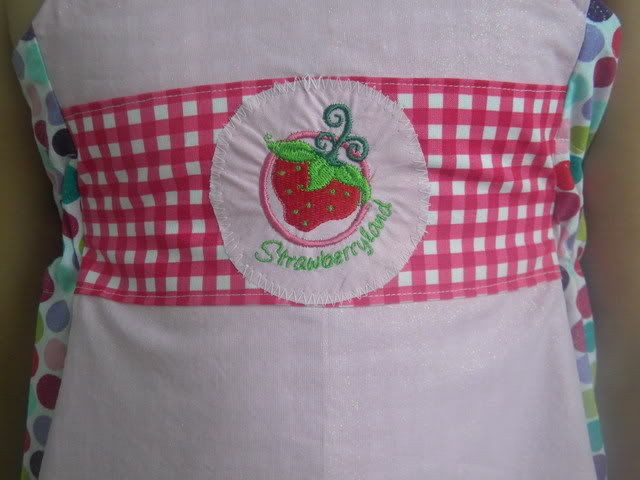
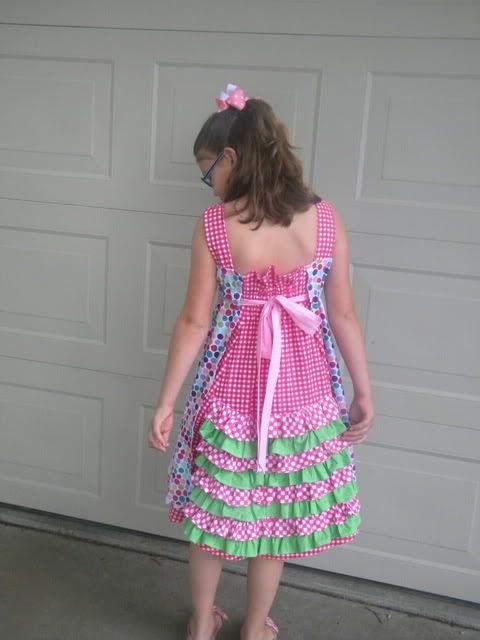
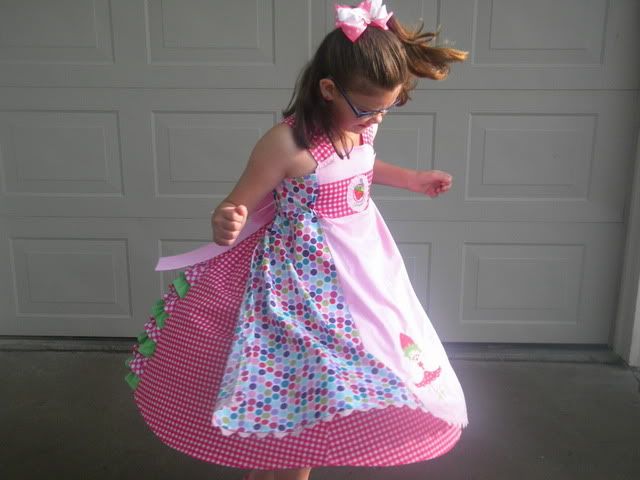
Last year my mom invited my 20 year old brother, but at the last minute he didn't want to get out of bed to go so she decided that she wasn't inviting him anymore! So KK is next in line! But I decided at last minute that she can't possibly go to a strawberry breakfast without a strawberry dress. So I went shopping for the fabric and downloaded the embroidery files and set to work making this thing 2 days before she needed it! Now, I didn't have a lot of time and I hade a million other things to do but I needed to make time for this! I guess I spent about 7 hours on it over 2 days, including staying up until almost midnight one night!
Hubby thought I was crazy and at points I was beginning to doubt myself, but I got it done! I did have to leave off one of the embroideries since I just didn't have time, but I think the dress is spectacular! I have made several Feliz's before but none with this much detail!
Pattern: Farbenmix Feliz
size: 140- the largest size, boo!
Embroidery- Tinimi
Front
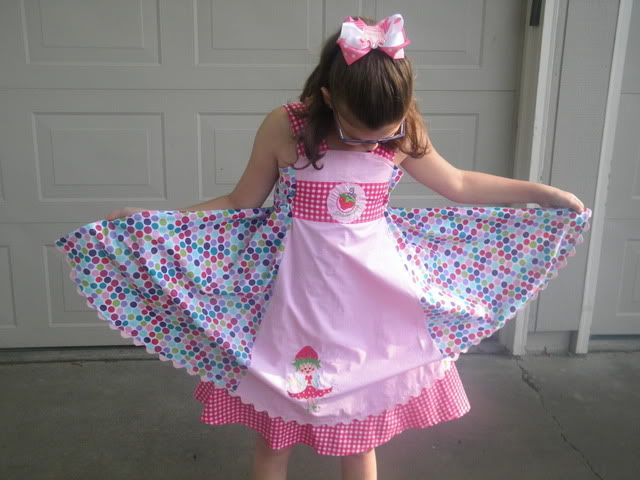
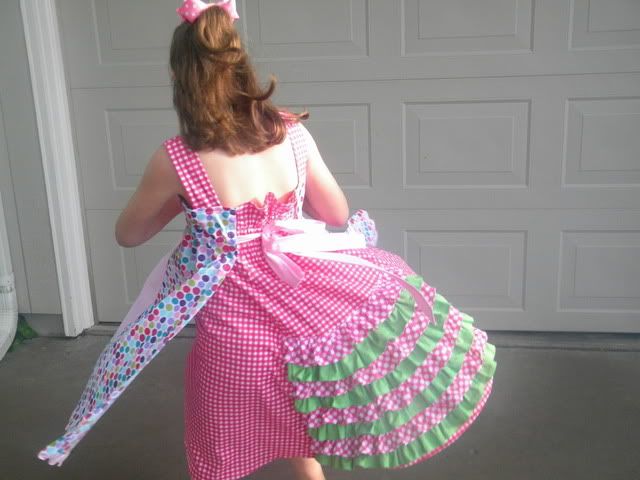
And the twirl factor is pretty awesome...
This girl twirled all day!
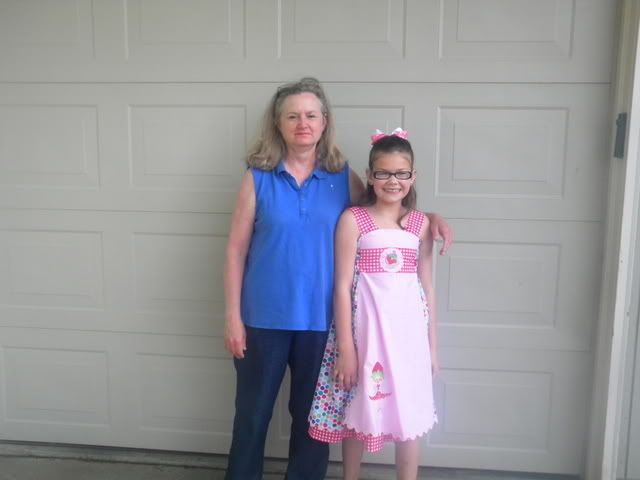
With my mom!
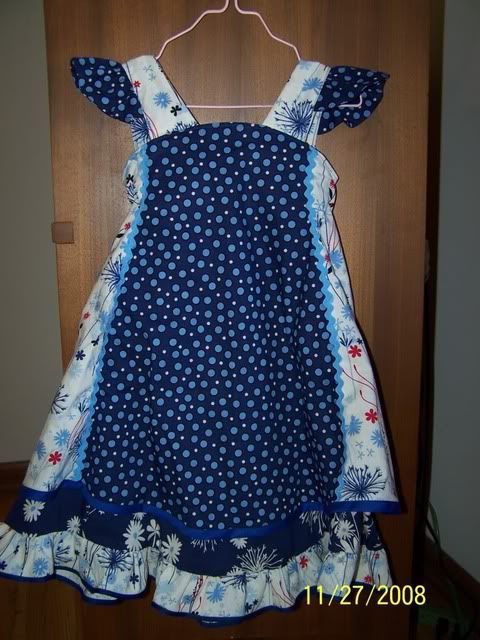
Here is Nin's party dress version! She wore this for probably 3 years until it was so short it was inappropriate! We passed it down to another little girl though.
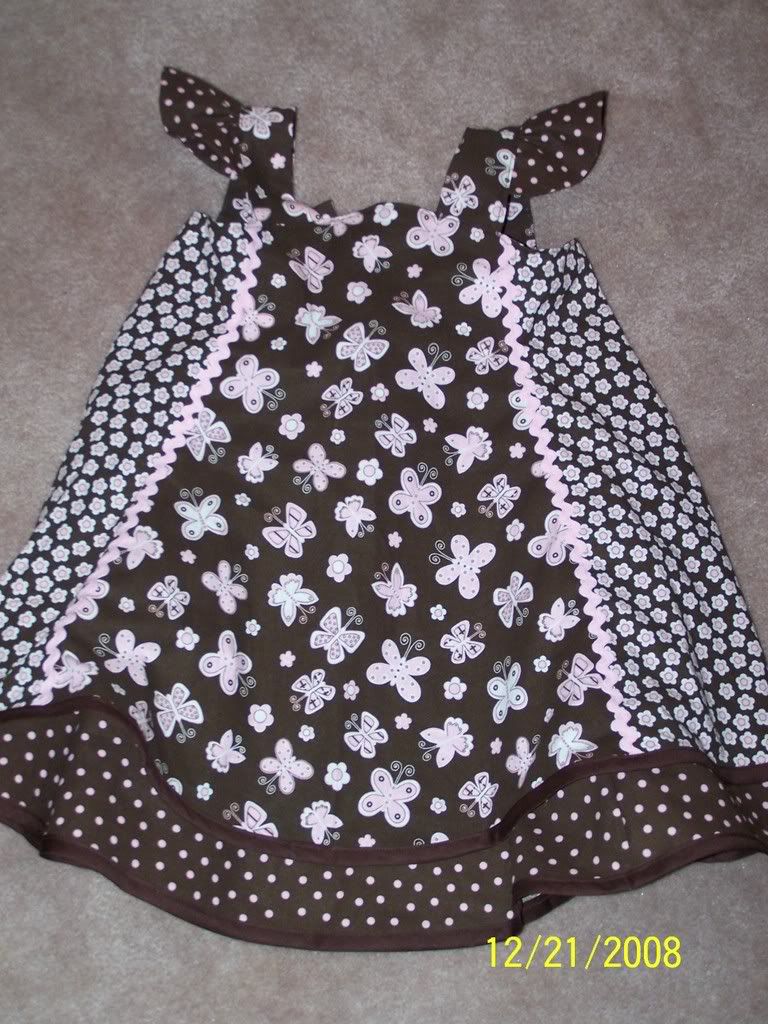
A brown and pink version....
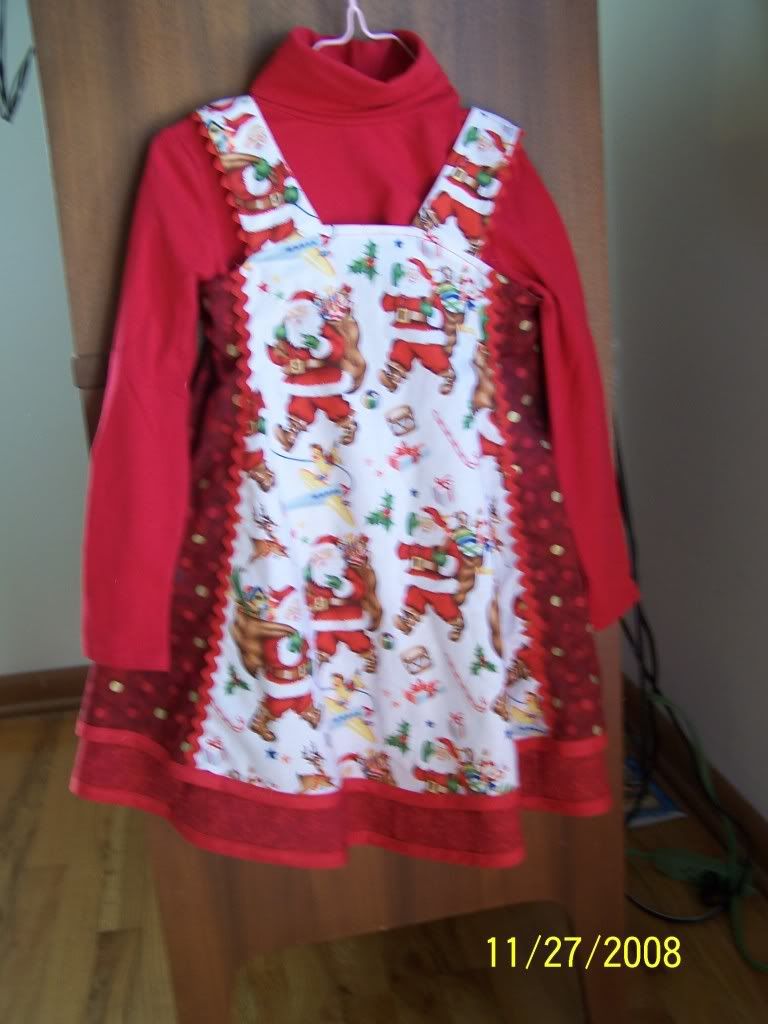
And a Christmas version...
Last year my mom invited my 20 year old brother, but at the last minute he didn't want to get out of bed to go so she decided that she wasn't inviting him anymore! So KK is next in line! But I decided at last minute that she can't possibly go to a strawberry breakfast without a strawberry dress. So I went shopping for the fabric and downloaded the embroidery files and set to work making this thing 2 days before she needed it! Now, I didn't have a lot of time and I hade a million other things to do but I needed to make time for this! I guess I spent about 7 hours on it over 2 days, including staying up until almost midnight one night!
Hubby thought I was crazy and at points I was beginning to doubt myself, but I got it done! I did have to leave off one of the embroideries since I just didn't have time, but I think the dress is spectacular! I have made several Feliz's before but none with this much detail!
Pattern: Farbenmix Feliz
size: 140- the largest size, boo!
Embroidery- Tinimi
Front
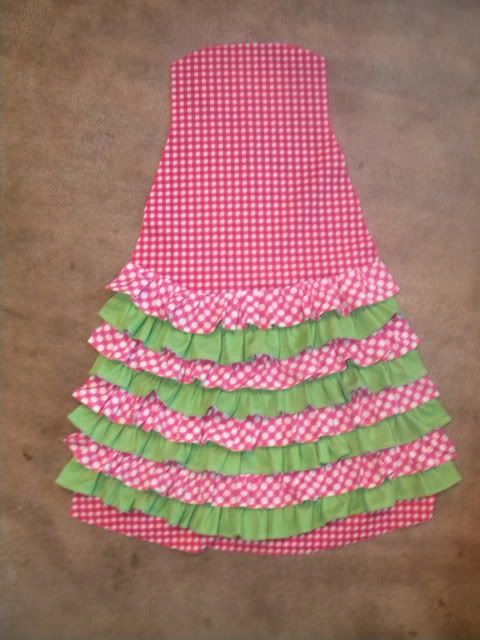
The best part about this dress? The ruffles!!!! After one look at it, KK said, I love how it's so big and fluffy! The ruffles started with 440 inches of material that was 3 in. wide. That is 36 feet! Good thing my serger ruffles! Here is the back before putting it all together..
And the twirl factor is pretty awesome...
This girl twirled all day!
With my mom!
Here is Nin's party dress version! She wore this for probably 3 years until it was so short it was inappropriate! We passed it down to another little girl though.
A brown and pink version....
And a Christmas version...
Thursday, May 3, 2012
Kids Clothes Week Challenge wrap up
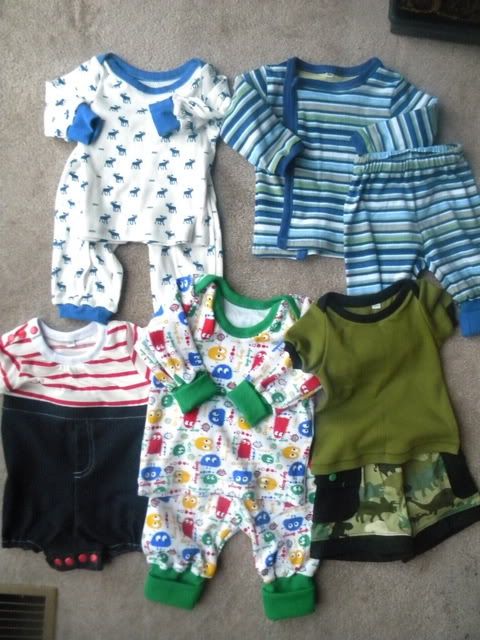
I managed to do somewhat decent for the KCWC. I got an hour in at least 5 of the days! It was exactly what I needed to push myself and get the clothes done for my baby nephew who is due to arrive in under 2 weeks! I still have many many many other sewing chores to get done, but this crossed several off my list!! How about some pictures of what I accomplished?
First off, this little deer outfit was not something I completed during the challenge, I actually completed it the day before, but it goes with my overall theme of baby clothes so I have to include it here!
Pattern:
Ottobre 1/2012 #10- for the pants
Ottobre 3/2011 #12 for the shirt
I must say that even though the outfit is super precious and cute, the pants are not my favorite. They have a seam on the outer leg. I just happen to prefer baby pants with fewer seams so as not to irritate little baby skin. So after making these I went back to the pattern I prefer.
My sister said she had plenty of clothes in newborn sizes but needed some 6 mo and up sizes. So I said okay, but then set about making whatever I wanted. Why did I ask?!! When creativity siezes, just go with it!
Baby gets an outfit to match the shorts I made for big brother Theo. These are about a 3mo, but the leg openings on the shorts are huge! Not sure what to make of them or if they will even fit in time for summer wearing!
Pattern:
Ottobre 3/2011 #15- shorts
#12- shirt
Look at these heavily topstitched pockets! Not sure what a tiny baby needs with such fantastic pockets, but they really do make the shorts!
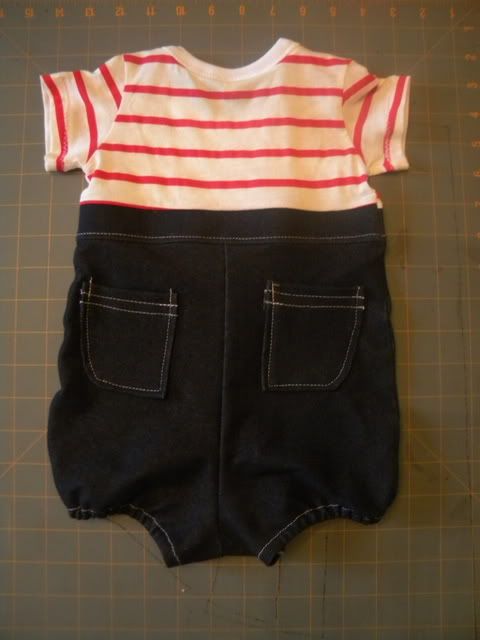
Ships ahoy!! Well maybe not, but this little outfit is certainly sailor inspired. I almost think it's too girly! But, again, this is the cutest thing I have ever made!! Are you tired of hearing that by now?!
Pattern:
Ottobre 3/2011 #11
Back- more pockets!
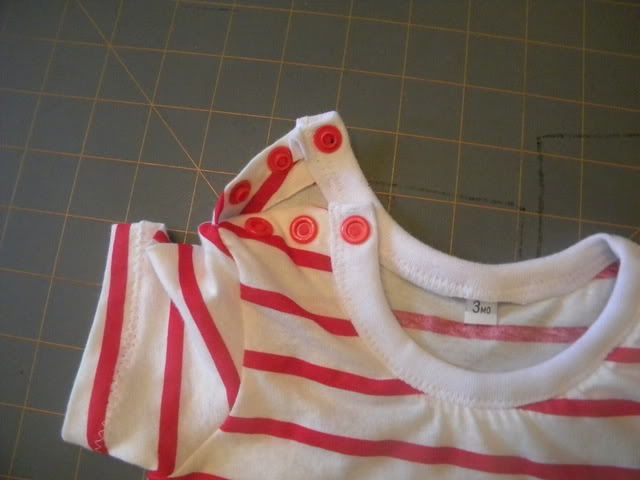
And I don't know what it is with Ottobre, but they seriously have issues with putting zippers in the back of baby clothes. Really. Knock it off already. First of all, who wants to hassle with flipping a baby over to zip up their clothes and secondly, that can't be comfy for a baby to be laying on that zipper all day. So as with all these ridiculous zippered outfits, I just cut the back on the fold and altered the pattern at the shoulder to add snaps.
Then I made a pair of pj's which I forgot to take a picture of.......
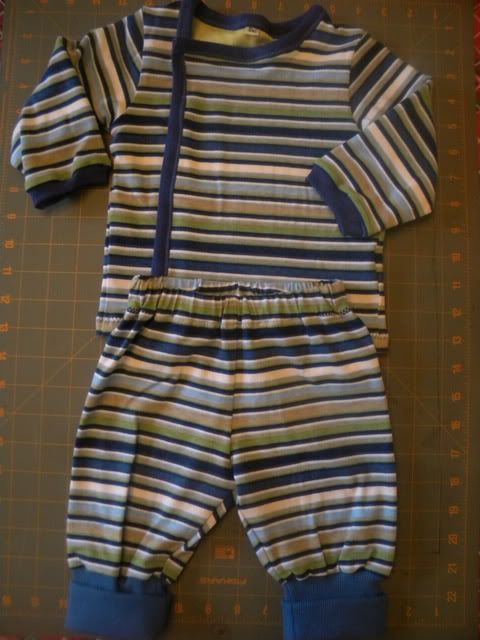
Then I set to work on pants and a matching jacket. Both size 6 mo. I still need snaps for the jacket but didn't have the right color.
Pattern:
Ottobre 1/2009 #10- pants
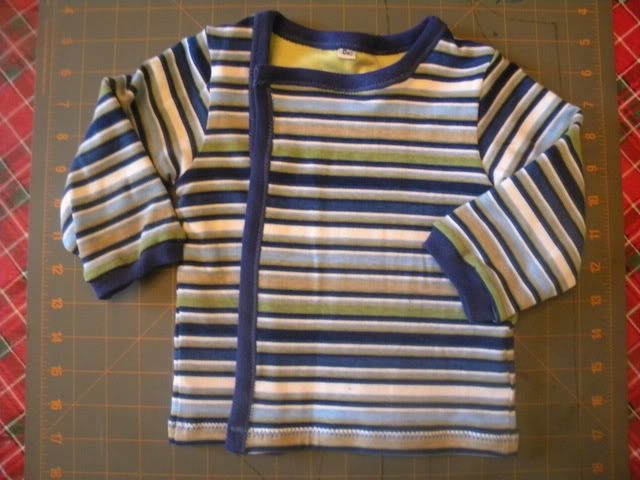
Ottobre 1/2012 #9- jacket
Love the square neckline of this jacket!
It's even lined! In a super duper soft lime green interlock!
Here is everything I am sending to her! Including the mising pajamas!
First off, this little deer outfit was not something I completed during the challenge, I actually completed it the day before, but it goes with my overall theme of baby clothes so I have to include it here!
Pattern:
Ottobre 1/2012 #10- for the pants
Ottobre 3/2011 #12 for the shirt
I must say that even though the outfit is super precious and cute, the pants are not my favorite. They have a seam on the outer leg. I just happen to prefer baby pants with fewer seams so as not to irritate little baby skin. So after making these I went back to the pattern I prefer.
My sister said she had plenty of clothes in newborn sizes but needed some 6 mo and up sizes. So I said okay, but then set about making whatever I wanted. Why did I ask?!! When creativity siezes, just go with it!
Baby gets an outfit to match the shorts I made for big brother Theo. These are about a 3mo, but the leg openings on the shorts are huge! Not sure what to make of them or if they will even fit in time for summer wearing!
Pattern:
Ottobre 3/2011 #15- shorts
#12- shirt
Look at these heavily topstitched pockets! Not sure what a tiny baby needs with such fantastic pockets, but they really do make the shorts!
Ships ahoy!! Well maybe not, but this little outfit is certainly sailor inspired. I almost think it's too girly! But, again, this is the cutest thing I have ever made!! Are you tired of hearing that by now?!
Pattern:
Ottobre 3/2011 #11
Back- more pockets!
And I don't know what it is with Ottobre, but they seriously have issues with putting zippers in the back of baby clothes. Really. Knock it off already. First of all, who wants to hassle with flipping a baby over to zip up their clothes and secondly, that can't be comfy for a baby to be laying on that zipper all day. So as with all these ridiculous zippered outfits, I just cut the back on the fold and altered the pattern at the shoulder to add snaps.
Then I made a pair of pj's which I forgot to take a picture of.......
Then I set to work on pants and a matching jacket. Both size 6 mo. I still need snaps for the jacket but didn't have the right color.
Pattern:
Ottobre 1/2009 #10- pants
Ottobre 1/2012 #9- jacket
Love the square neckline of this jacket!
It's even lined! In a super duper soft lime green interlock!
Here is everything I am sending to her! Including the mising pajamas!
Wednesday, April 25, 2012
2 shirts for me!
My personal sewing quest continues! I spent the better part of an afternoon sewing up 2 shirts for myself.
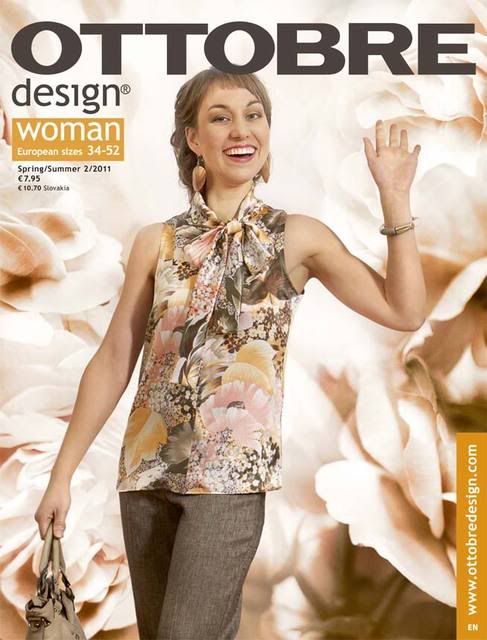
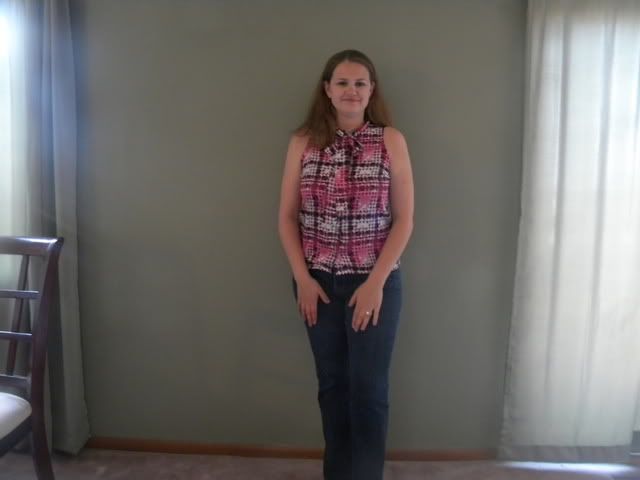
The first is a silky, sleeveless number from a recent Ottobre. I decided to make a muslin since it is a button up and fit matters. I used this slippery, poly stuff from JoAnns red tag table that cost me $2.50 a yard. Bingo! Perfect muslin making fabric! It was not the best to cut or sew and kept slipping all over the dang place. But I got it done and I like the shirt as a pattern, but I am just not sure if this is wearable. It's too tight in the bust, and although the buttons don't gap, there isn't much room. The waist is fine but it's a smidge too tight in the hips. And I think it's too short.
Before cutting out the fabric for this one, I had moved the bust dart down, since the pattern had it above my bust.... I also should have done a FBA (full bust adjustment) to give the girls more room. FBA's keep the side seams the original size while adding more room to the cup portion of the bust. So, I pulled the pattern back out and in a couple days, I will alter it and try again. Which is the purpose of making a muslin!
Pattern: Ottobre 2/2011 #9, size 40.
The first is a silky, sleeveless number from a recent Ottobre. I decided to make a muslin since it is a button up and fit matters. I used this slippery, poly stuff from JoAnns red tag table that cost me $2.50 a yard. Bingo! Perfect muslin making fabric! It was not the best to cut or sew and kept slipping all over the dang place. But I got it done and I like the shirt as a pattern, but I am just not sure if this is wearable. It's too tight in the bust, and although the buttons don't gap, there isn't much room. The waist is fine but it's a smidge too tight in the hips. And I think it's too short.
Before cutting out the fabric for this one, I had moved the bust dart down, since the pattern had it above my bust.... I also should have done a FBA (full bust adjustment) to give the girls more room. FBA's keep the side seams the original size while adding more room to the cup portion of the bust. So, I pulled the pattern back out and in a couple days, I will alter it and try again. Which is the purpose of making a muslin!
Pattern: Ottobre 2/2011 #9, size 40.
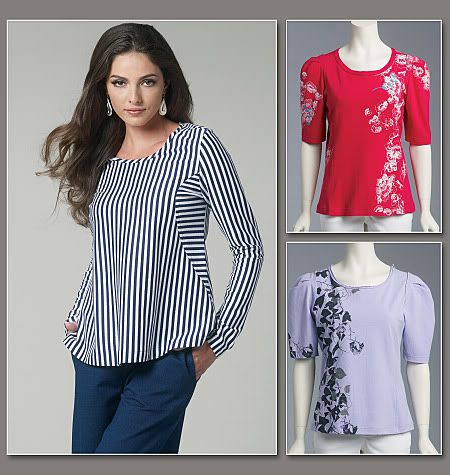
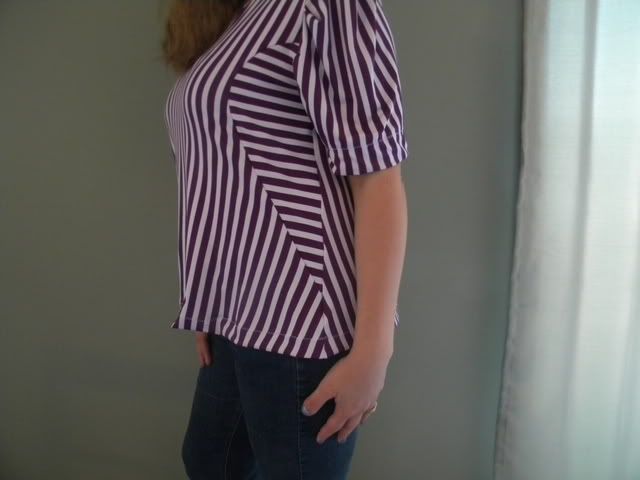
Then I pulled out a new Vogue pattern I purchased recently. I bought the pattern because I knew I had the perfect fabric to use with it!
I wanted to make the main view, which has little side cutouts with the fabric placed in the opposite direction. But I also wanted the short sleeves since we are going into summer here! It will be 91 degrees this week! In April.... The short sleeves have these little box pleats at the shoulder seam and are very bulky and I don't like the way they lay. Since the shirt itself is flowy, I think the need the more conservative sleeves like the pattern envelope shows. Oh well, live and learn and all that jazz.
I think I will rip them out and re-cut the sleeves into a regular ole' short sleeve and see if I like it better.
Otherwise, I like the pattern fine, but it may a bit too flowy for me. Maybe paired with some skinny pants?
Love the side cutout!
See what I mean about the sleeves. There is just too much going on up there.
Photography credit goes to my 7 year old.
Monday, April 23, 2012
Kids Clothes Week Challenge
Today marks the start of Kids Clothes Week Challenge! The idea is to sew at least an hour a day for the next 7 days! At the end of the week, your kids should have some new clothes out of the deal! Well, my kids need nothing, but I still want to participate so I think I will work on baby clothes for my new nephew. I mean, he is due to arrive in 3 weeks, I had better get busy!
Go on over to Elsie Marley's blog and read more about it!
Thursday, April 19, 2012
Clothes for Mama!
I usually don't make many clothes for myself. Mainly because my kids grow out of theirs so fast and it kills me to have to pay for clothing for them! I just don't have a lot of time. But because their growth spurts have been minimal as of late, their wardrobes are quite stocked! Recently, I have also lost some weight and/or inches so some of my clothing is on the baggier side! Go me!
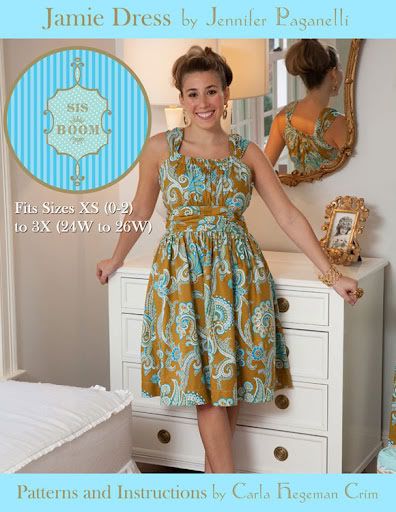
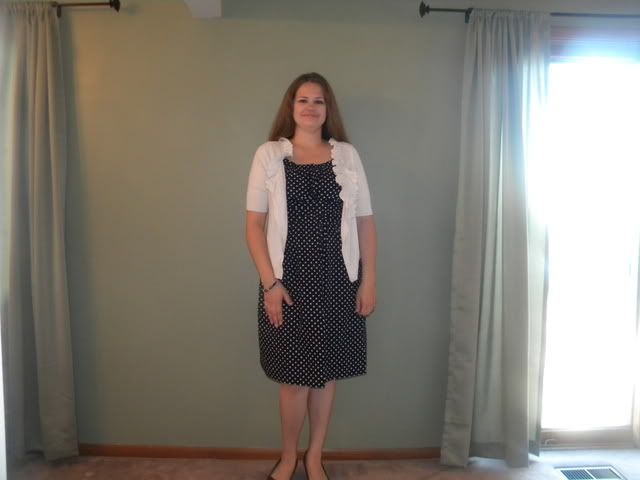
We start with the Jamie Dress! I am about a year late to the Jamie Dress party! I bought it after seeing some great examples on various blogs.
Although most reviews are favorable, quite a few ladies commented on the changes they made which were the same over and over again. So I decided to make a muslin to see what changes, if any, I needed.
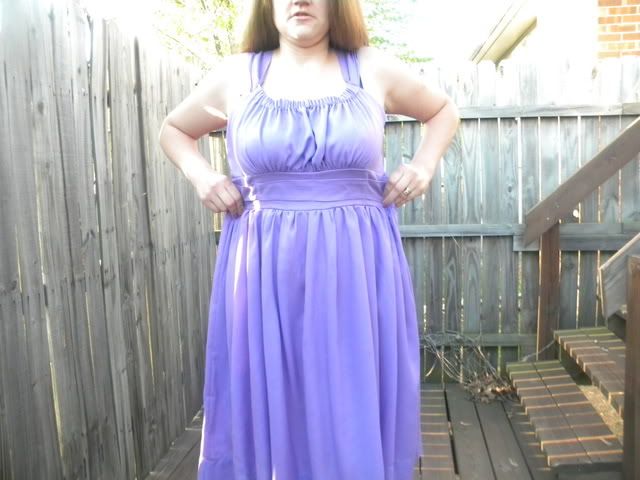
Pattern: Jamie Dress by Sis Boom
Size- XL. I made an XL based on my bust measurement but it was pretty big, so i sized down to a large on the next one.
This one is true to the pattern, except for one change. I continued the waistband from the front around to the back. Who knows why the pattern maker only had the waistband on the front? It really does boggle my mind!
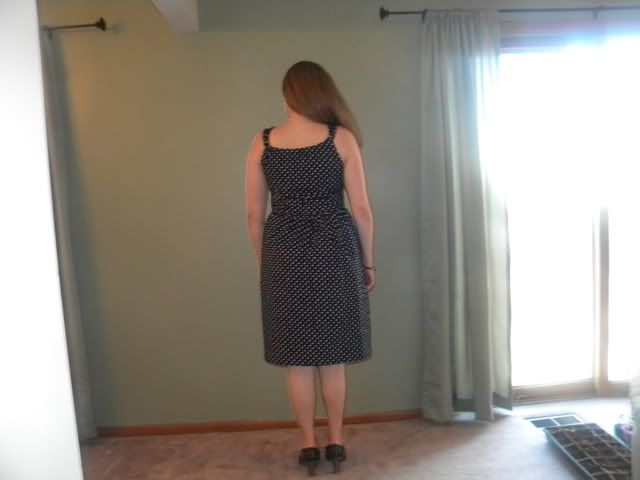
Back
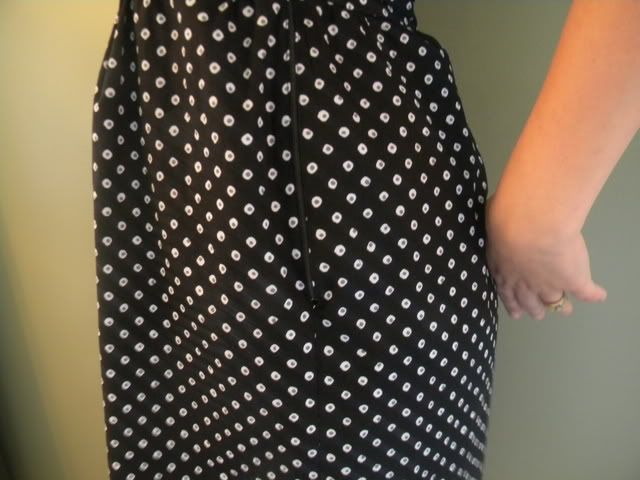
See how much excess there is!
I guess I didn't do to great of a job drafting the waistband for the back! Maybe that's why they left it off?
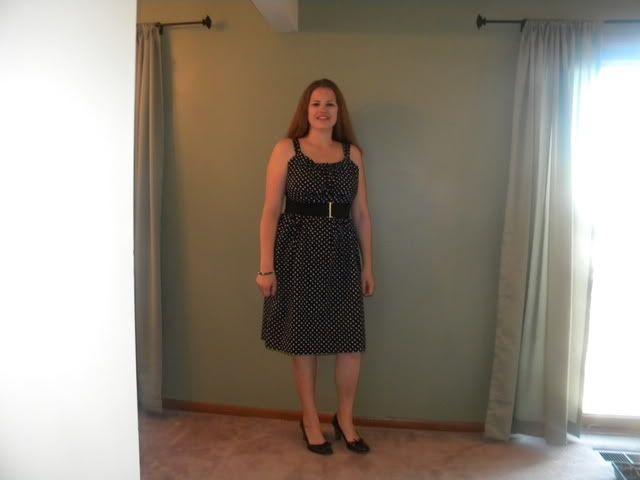
Once I had the kinks worked out, I made another in a great fabric! It is from the Lisette line at JoAnn's. I took gathers out of the bodice and the skirt! I also shortened the elastic in the top casing that gathers the top edge of the bodice.
Much better job drafting the back waistband this time! It lined up!
Pattern: 2/2011 Ottobre, #1
Size 42
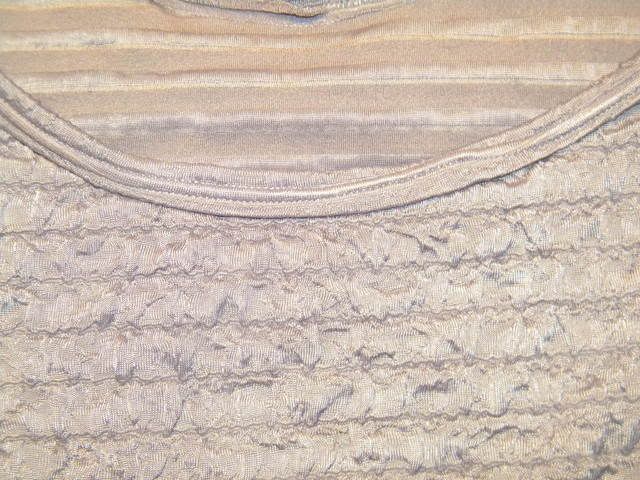
A close up of the neckline binding. It's looks pretty wonky, mainly because it is. The ruffles were tough to topstitch over!
I think I am going to make the other version next! I actually really like the shirt and it's a great length for me.
Here is the back view. I love the little peekaboo triangle at the top. Can you see the rouching in the sleeves? I thought I would like this about the top but they have you create a casing from the seam allowance and it's really bulky. It's a nice detail but I just wish it was executed differently. So I think next time I will either gather or use lastin to make the gathers.
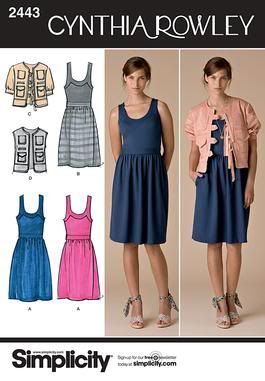
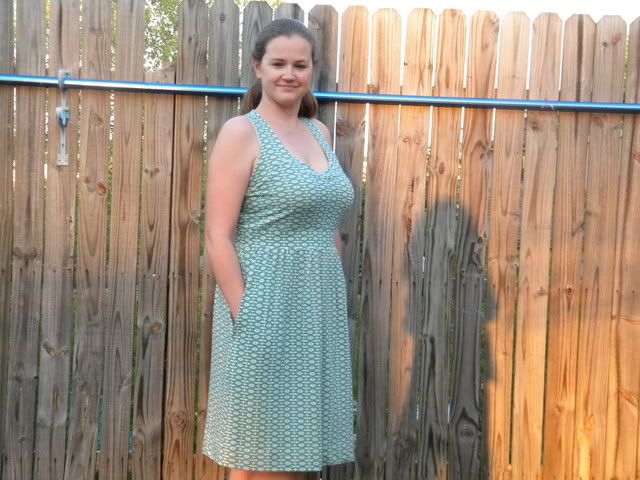
Finally, I made a sundress from a Big 3 pattern. I am always leery of Big 3 patterns just because the sizing is always sooo off. You can really tell in this muslin how off the fit of the bodice is. I had to shorten the straps by 3 inches and they still don't fit correctly. The top is too low and I may run into another wardrobe malfunction like above! The waist is too long. Yes, you read that right! I am the most long waisted person I know and I found a pattern that needs the bodice shortened. I can't believe it myself! This never happens! But above the waistband on the back there is a floppy part of material that just sort of sits on the waistband like it's a little shelf. Not what I need above my rear end.
This pattern would need so much work to get it to fit right I am not even sure if I will remake it. I would need to:
shorten the straps
shorten the bodice by about an inch or so
raise the top edge of the bodice
make a taller waistband- although that is just personal preference
and see those "smiles" in the area of the bust, that means I need a full bust adjustment to give the girls more room!
Pattern: Simplicity 2443
We start with the Jamie Dress! I am about a year late to the Jamie Dress party! I bought it after seeing some great examples on various blogs.
Although most reviews are favorable, quite a few ladies commented on the changes they made which were the same over and over again. So I decided to make a muslin to see what changes, if any, I needed.
Pattern: Jamie Dress by Sis Boom
Size- XL. I made an XL based on my bust measurement but it was pretty big, so i sized down to a large on the next one.
This one is true to the pattern, except for one change. I continued the waistband from the front around to the back. Who knows why the pattern maker only had the waistband on the front? It really does boggle my mind!
Back
See how much excess there is!
I guess I didn't do to great of a job drafting the waistband for the back! Maybe that's why they left it off?
Once I had the kinks worked out, I made another in a great fabric! It is from the Lisette line at JoAnn's. I took gathers out of the bodice and the skirt! I also shortened the elastic in the top casing that gathers the top edge of the bodice.
Much better job drafting the back waistband this time! It lined up!
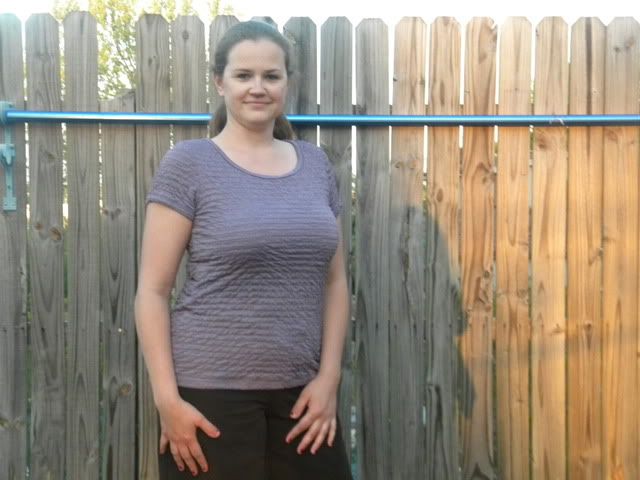
I also made a top from this fun, ruffly knit fabric from JoAnn's off the Project Runway line.
Pattern: 2/2011 Ottobre, #1
Size 42
A close up of the neckline binding. It's looks pretty wonky, mainly because it is. The ruffles were tough to topstitch over!
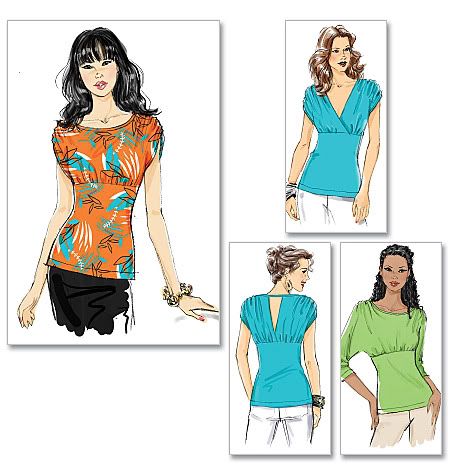
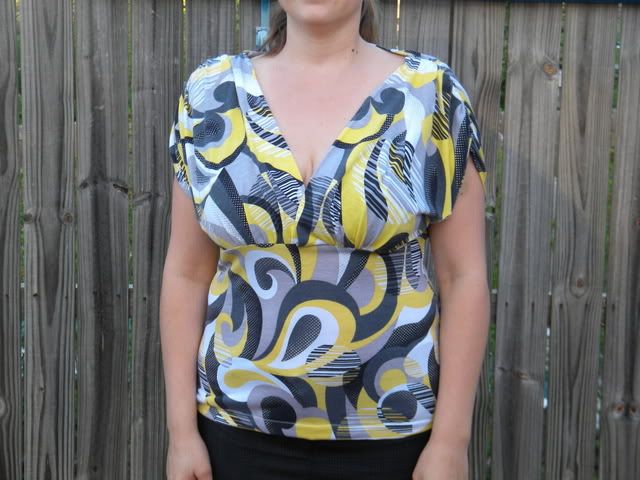
Another top! This top is extra saucy! Mainly because the front V is not tacked together any where and one bad move ends in disastrous wardrobe malfunctions. I bent over to pick something up when hubby was taking pics and literally, the shirt parted and the girls fell out. Huzzah! The V needs to be tacked together, but otherwise, love the shirt! Made out of some sparkly jersey from Girl Charlee.
Pattern: Butterick 5497
Size- Can't remember?
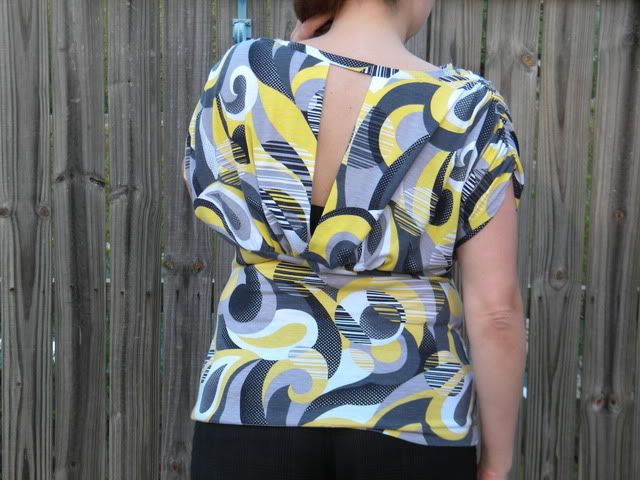
Here is the back view. I love the little peekaboo triangle at the top. Can you see the rouching in the sleeves? I thought I would like this about the top but they have you create a casing from the seam allowance and it's really bulky. It's a nice detail but I just wish it was executed differently. So I think next time I will either gather or use lastin to make the gathers.
Finally, I made a sundress from a Big 3 pattern. I am always leery of Big 3 patterns just because the sizing is always sooo off. You can really tell in this muslin how off the fit of the bodice is. I had to shorten the straps by 3 inches and they still don't fit correctly. The top is too low and I may run into another wardrobe malfunction like above! The waist is too long. Yes, you read that right! I am the most long waisted person I know and I found a pattern that needs the bodice shortened. I can't believe it myself! This never happens! But above the waistband on the back there is a floppy part of material that just sort of sits on the waistband like it's a little shelf. Not what I need above my rear end.
This pattern would need so much work to get it to fit right I am not even sure if I will remake it. I would need to:
shorten the straps
shorten the bodice by about an inch or so
raise the top edge of the bodice
make a taller waistband- although that is just personal preference
and see those "smiles" in the area of the bust, that means I need a full bust adjustment to give the girls more room!
Pattern: Simplicity 2443
Friday, April 13, 2012
Farbenmix Tini
Another great Farbenmix pattern, the Tini! I bought it 2 summers ago and never got around to trying it out. So it's about time I used it!
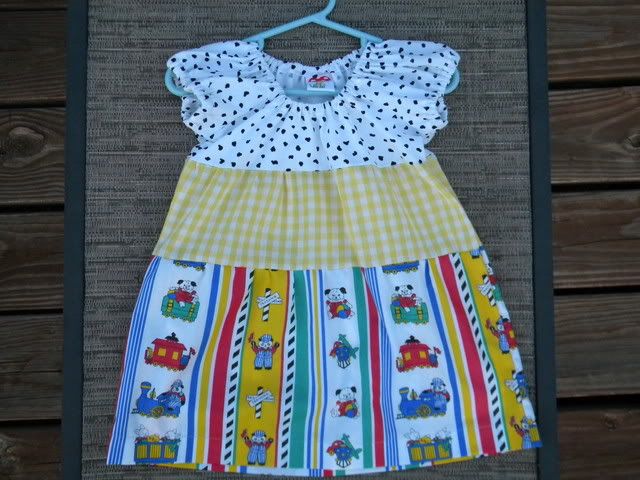
I was cleaning out huge bins of fabric that people have given me over the years and found a bunch of older fabric. It was stiff, probably because it is polyester, but I was hoping a trip through the washer and dryer would loosen it up. I was right! So I combined this black and white polka dot, some yellow gingham and some train fabric. I think they look great together! You know, sometimes I will sit and look at fabric and instantly an image pops up in my head of what I want to do with a piece of fabric. That happened with these particular pieces. As soon as I layed them down next to each other I knew they needed to be a tiered peasant style dress. They are a little to young for my girls, so in mind they belonged to baby Avie! I love when it all works out!
Pattern: Farbenmix Tini
size 86, which is the smallest it comes, but may be too big for tiny little Avie.
I searched for a long time trying to find an embroidery of those railroad crossing signs that are yellow with black letters that say R/R. But I couldn't find one that was just perfect. So I let it go. But I still think the dress came out pretty darn cute!
I was cleaning out huge bins of fabric that people have given me over the years and found a bunch of older fabric. It was stiff, probably because it is polyester, but I was hoping a trip through the washer and dryer would loosen it up. I was right! So I combined this black and white polka dot, some yellow gingham and some train fabric. I think they look great together! You know, sometimes I will sit and look at fabric and instantly an image pops up in my head of what I want to do with a piece of fabric. That happened with these particular pieces. As soon as I layed them down next to each other I knew they needed to be a tiered peasant style dress. They are a little to young for my girls, so in mind they belonged to baby Avie! I love when it all works out!
Pattern: Farbenmix Tini
size 86, which is the smallest it comes, but may be too big for tiny little Avie.
I searched for a long time trying to find an embroidery of those railroad crossing signs that are yellow with black letters that say R/R. But I couldn't find one that was just perfect. So I let it go. But I still think the dress came out pretty darn cute!
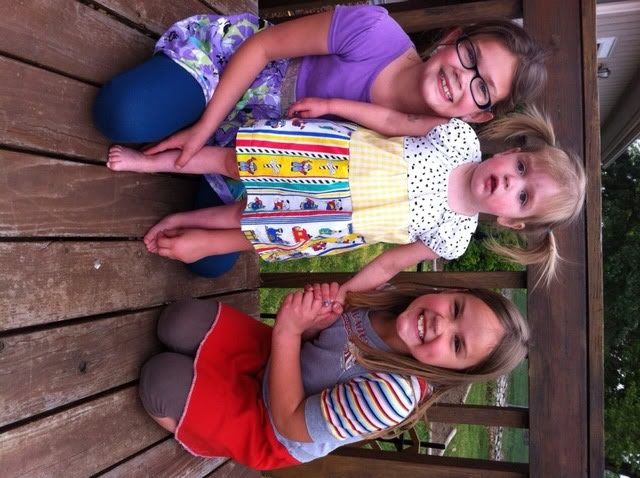
Update: I finally got a modeling shot of this dress on little Avie! Not too big at all!
Subscribe to:
Posts (Atom)